

Step 1 – The vision!
“Adrift at sea.” That is how I described my dining room table when asked by Laura Canale, interior designer of Libélula Interiors — like a piece of driftwood floating on the ocean with turquoise water flowing through every crevice.
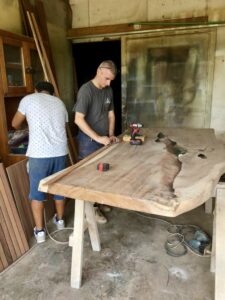
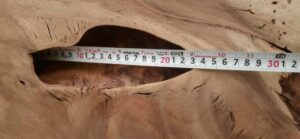
Laura immediately connected me with Jean-Sebastian Quintana, owner-operator of Caribbean House Studio in Playa Del Carmen. After hearing my vision, he produced a gorgeous slab of parota wood, one of several Mexican hardwoods, with a cavernous hole down the middle — it was perfect!
Step 2 – Drying the wood.
Far too many parota suppliers simply do not properly prepare wood meant for furniture making, leaving unsatisfied customers when months later their furniture begins to split. This particular supplier had a large metal garage-like structure with industrial wood burning heaters and vans for exhausting moisture. A dry, hot environment is created causing the water inside the wood to evaporate, drying it out completely. This process takes a week. If done too quickly and not thoroughly enough, it doesn’t matter how hard the wood is, any moisture left inside will cause it to warp and crack.
Step 3 – Sizing the table.
In the wood shop at the rear of Caribbean House, a wood frame is created measuring 1.2 meters x 2.1 meters (4 ft. x 7 ft.). The frame is moved around the top of the slab to determine where the wood will be cut to size. Often with these types of tables, it is sliced down the middle and flipped open to create straight edges on the outside. This leaves a large opening in the middle for resin to create a river effort. A river wasn’t the look I was going for — an ocean was! We all felt keeping the integrity of this magnificent piece of wood was more aesthetically valuable and so the decision was made to keep it as one solid piece and put the resin on the outside to make the rectangular shape. The top and bottom of the slab were sanded down until it measured 2.25″ in thickness.
At this point Raúl Zaragoza of The FX Studio, located next door to Caribbean House, got involved in the process. Having made resin tables before, Raúl knew he had a monumental task ahead — the risk of messing it up was great — this is not a job for untrained craftsmen, as too many variables can ruin the piece completely.
Step 4 – Volume Calculated!
After cleaning the wood, and before wood and resin ever meet, there is a lot of measuring to calculate the volume of resin needed. Resin is not cheap ($380 mxn/Kg or about $18 usd/Kg and $23cad/Kg), so getting this measurement correct is paramount. My table required 70 kg of resin and cost approximately $26,600 mxn (about $1,300 usd or $1,600 cad) before shipping, taxes, and cost of pigment for coloration. Once calculations are made, the resin is ordered from Mexico City.
While waiting for delivery, several other steps are completed.
Step 5 – Preventing bubbles.
Wood is porous, so every pore of the parota slab is sealed with resin using a brush. If this step is missed, air trapped inside the wood will be forced out when resin is poured in, creating bubbles. Eliminating every bubble is virtually impossible — my table, despite the measures taken, shows a minor amount of bubbles and debris, and that is only if you are really looking for it. One day of drying time is required.
Step 6 – Creating the mold.
A wood mold is created around the slab. This will be the outline of the table in which the resin will be poured.
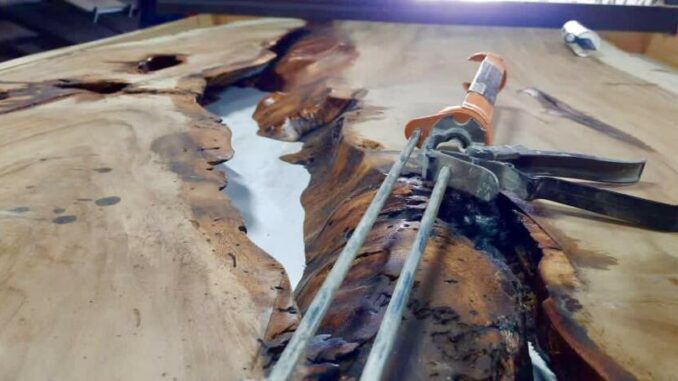
Step 7 – Securing the slab.
A thin line of silicone is applied to all edges. The wood is then flipped over and jumbo clamps are attached. The silicone barrier prevents the colored resin from flowing under the table and coating the wood, while the clamps keep the table from floating up.
It is allowed to dry for one day.
Step 8 – Creating color.
The resin arrives from Mexico City and is transparent with a purple hue. Raúl combines different amounts of pigments in blue and green to create a custom turquoise blue (check out the link above to a short video on mixing the pigments).

Small pucks of resin are cast and serve as a color sample, which is shown to me for approval. The process was repeated four times until the right color was found.
Next Raúl calculates the amount of pigment to make a liter of colored resin. They know the color is perfect when they drop the puck into the liter of resin and it disappears — if the puck is visible, the color is off, and the resin is wasted. This process is repeated with a small volume of resin at first until the formula is perfect.
The formula is then calculated for a greater volume — enough to complete a 2.5 cm (1 “) layer. If Raúl makes a mistake with the color this time, it will be an expensive one, as the entire bucket of resin will be wasted. One 19 Kg bucket of resin is $7,220 mxn ($350 usd or $440 cad). In my table approximately 3.68 buckets were used.
Color correctness is crucial because if, on the second layer, the color is off and is poured on top the first layer, it will create a visible sandwich effect. According to Raúl, this part of the process is extremely stressful.

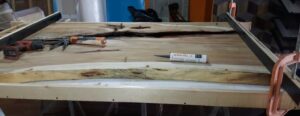
Step 9 – Transparent bottom layer.
A clear layer of resin is poured, heated with a heat gun, and allowed to expand on the bottom of the slab creating a micro layer for the colored layer to rest on. One day of drying time is needed.
Step 10 – Those darn mosquitoes.
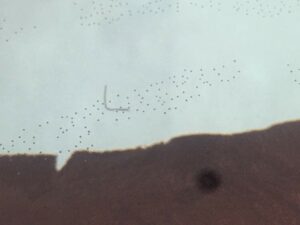
The turquoise resin is poured and agitated with a stick to prevent separation (see link below to video clip of this process). The workers let the table dry overnight and return the next morning. Initially they are delighted, “Look at the table. It looks so beautiful …” Then horrified by what they see. “Look, there’s a mosquito stuck to the resin!”
Debris like dust, hair, fibers, and insects are a constant problem during this part of the process. The only way to remove the offending debris is to sand it off by hand. If debris is noticed deep inside the resin, they drill a hole, remove it, and then fill the hole with resin — once dry, no one would ever know the difference: the freshly poured resin just disappears.
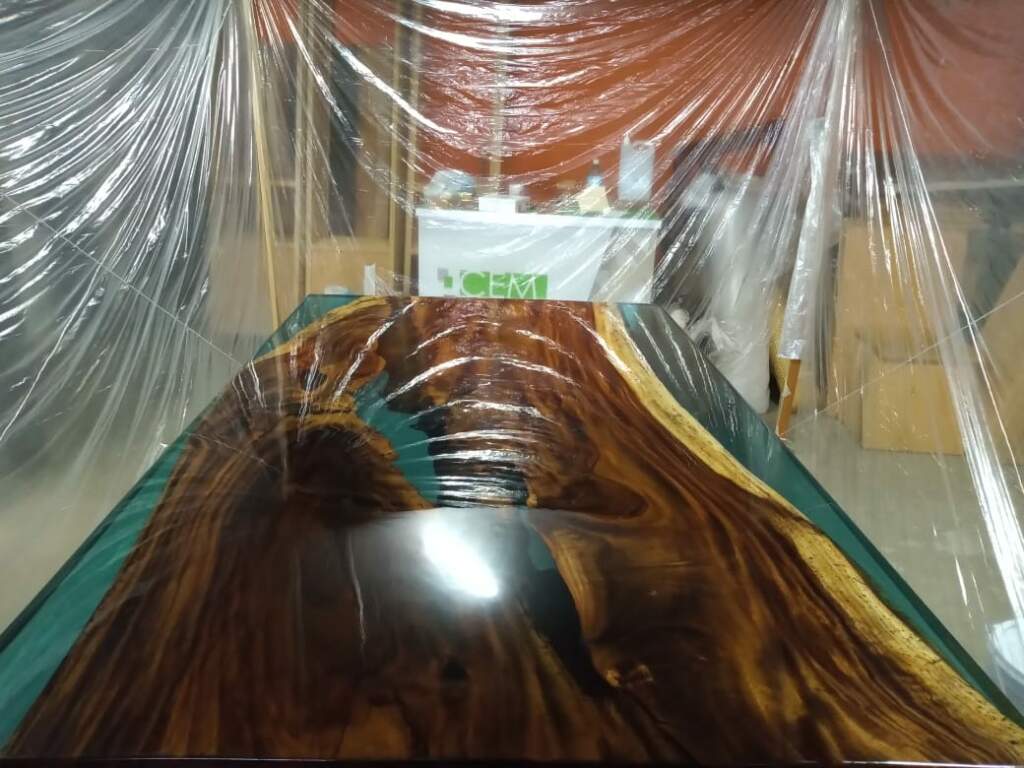
Removing debris accumulated overnight can take up to half a day to complete. For this reason, every effort is made to mitigate debris around the table; a plastic bubble is created, and this is where the table will remain for the rest of the resin process.
LINK to Pouring first layer of turquoise resin
Step 11 – Second resin layer.
The middle layer of turquoise resin is poured and allowed to dry overnight. Flies and dead mosquitos are sanded out the next morning. One day of drying time.
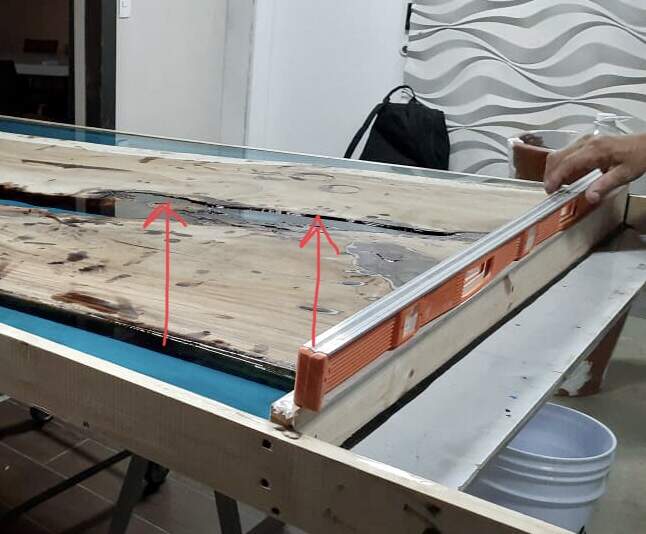
Step 12 – A third turquoise layer.
It is at this point they notice a problem. Raúl, having experienced this before, isn’t overly worried.
The weight of the resin has caused the table to shift, taking everything out of level. The problem is only noticeable on the last layer when the level of liquid resin against the top of the wood appears off-kilter. Using wood shims, the table is levelled once again and the pouring of the last layer of color continues.
One more day to dry.
Step 13 – The sanding process begins.
The table is is sanded smooth so resin and wood become seamless.

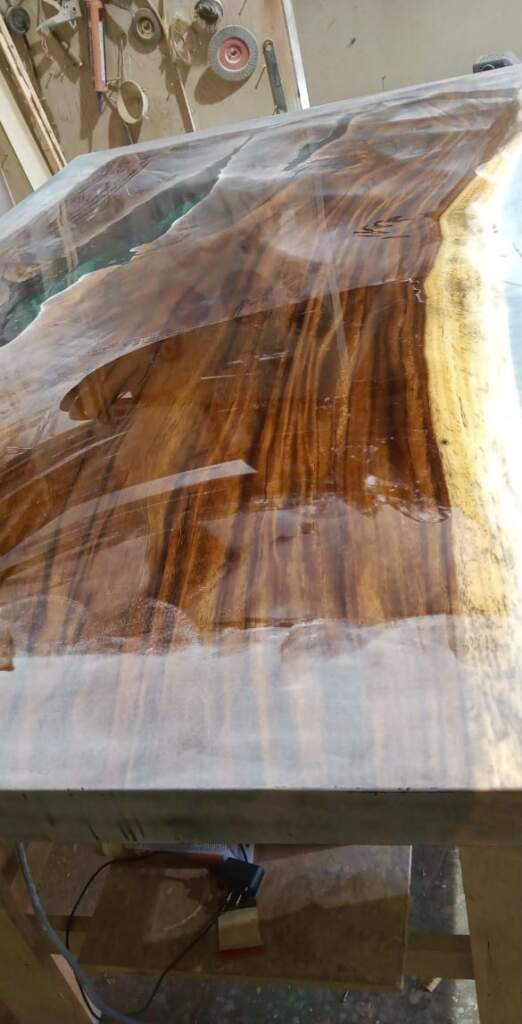
Step 14 – The final clear layer is the hardest layer of all!
A final transparent resin layer is poured and proves to be the most difficult. If any debris lands on the table now, it cannot be removed easily as the entire 2.6 sq. m. (28 sq. ft.) of table surface must be sanded down completely after it is dry. Sanding just the area of the offending debris is not an option, as it destroys the glass-like finish which cannot be polished out later.
During this phase, the workers brush off their clothes, put their hair in nets, and don gloves and face masks before entering the plastic bubble.
On my table, the final layer needs to be completely removed and reapplied three times (see video clip below).
LINK to video clip of sanding of surface of the table to remove debris was necessary three times.
Step 15 – Polishing.
Once a debris-free final resin surface is successfully completed, polishing begins.
Step 16 – Touch-Ups.
The table is moved into the bright, natural light of Caribbean House next door where they see imperfections and have an opportunity for touch-ups.
It is also an opportunity for the store to show off its latest creation to browsing customers — and the table attracted a lot of attention!
Step 17 – A structure to stand on.
Black iron legs are custom made off site by a third vendor.
Step 18 – Finale.
Delivery to my dining room required four strong people to carry and bolt it on to the legs. This was probably the least stressful part of the entire process!
A total of six months from obtaining the wood to completion, plus three businesses and seven people, were needed to complete this work of art. There exists no other table exactly like it — the beautiful result of having a vision, and finding the right people with the right skills to make that vision a reality.

Thanks to Raúl Zaragoza and his team at The FX Studio
Laura Canele of Libélula Interiors
Jean-Sebastian Quintana of Caribbean House Studio [www.caribbeanhousestudio.com]
Written by Brenda Calnan
Leave a Reply